How to make a Windows bootleg/WindowsXP: Difference between revisions
| Line 12: | Line 12: | ||
=== Acquiring themes === | === Acquiring themes === | ||
You can acquire themes through sites like DeviantArt, or rip them out of already existing bootlegs. I host a few that I took out of a bootleg from 2010, you can find them [https://egg.l5.ca/files/Other/Crusty%20XP%20Themes/ here] | You can acquire themes through sites like DeviantArt, or rip them out of already existing bootlegs. I host a few that I took out of a bootleg from 2010, you can find them [https://egg.l5.ca/files/Other/Crusty%20XP%20Themes/ here] | ||
=== Acquiring programs === | |||
If you want to slipstream programs into your bootleg, gather every program you want to include. You'll also need a tool like WPI to have a crusty GUI for installing your programs, or you can just write a simple batch script to install all of them. You can later add the WPI/script as a program to run automatically at first boot later in nLite. | |||
=== Extract the ISO === | === Extract the ISO === | ||
Revision as of 01:55, 14 April 2024

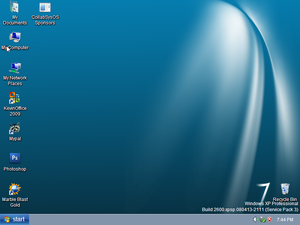
In this tutorial, I'll be going through how I make Windows XP bootlegs. It's unfortunately not as easy as Windows 7+ and a pain in the ass to do, but you can get a basic crusty mod out of it. This will also work for Windows 2000 and Windows Server 2003, though I wouldn't see the point in modding those.
Pre-requisites
We'll be using these tools in the tutorial:
- A Windows XP ISO: You can find these basically anywhere and use any one you want, but I'd recommend you use the one I host, as it has SP3 and every update up to November 2013. Click here to download it
- Access to a Windows install: You will need a Windows install with basic utilities such as makecab. Most Windows installs already have this, so you shouldn't worry too much about this.
- nLite: This is optional, but highly recommended for making any finishing touches to your mod. These include things like unattended installs, update sideloading and some patches like 3rd-party themes.
- Any file hosting service: You'll need this to host your ISO obviously. I personally host mine on our own server, but you can use something like Google Drive or MediaFire.
Preparation
Acquiring themes
You can acquire themes through sites like DeviantArt, or rip them out of already existing bootlegs. I host a few that I took out of a bootleg from 2010, you can find them here
Acquiring programs
If you want to slipstream programs into your bootleg, gather every program you want to include. You'll also need a tool like WPI to have a crusty GUI for installing your programs, or you can just write a simple batch script to install all of them. You can later add the WPI/script as a program to run automatically at first boot later in nLite.
Extract the ISO
Once you have obtained an ISO, open it with a extraction utility like 7-Zip or WinRAR. You need a writable working directory to mod the files, simply mounting the ISO will not do anything. Extract it to your Desktop folder in a folder named whatever you want. And now it's time to get into the meat and potatoes of this article, actually making the bootleg.
Mod the files
In Windows Vista and later, the setup engine uses a highly compressed file called "install.wim" for all the files that it needs to copy. Windows 2000, XP and Server 2003 use a different format... it stores all the files it needs to copy in a folder called "I386" on the root of the CD. Most, if not all files in here are cabinet files, which contain the actual file that setup copies, so for shell32.dll it is stored in I386 as "SHELL32.DL_". This is proven upon opening the file with your file extraction software. So, for every file you want to modify:
- You will need to open it with a file extraction utility
- Copy it to where-ever
- Open it with a resource modifier tool like Resource Hacker
- Save it and run the following command:
makecab file.ext FILE.EX_(for example:makecab logonui.exe LOGONUI.ex_,makecab shell.32.dll SHELL32.DL_) - Move the newly created cabinet back to I386, replacing the old one.
Unfortunately, it has to be that way and that's why I said it's a real pain in the ass to create XP bootlegs, and mods in general. There ARE ways to make Windows XP install from a wim file, but that's out of the scope for this article and we won't be covering that.
You will need to do this for every file you modify, but if you want a specific theme for your bootleg, programs like Isso Pack can automatically go in and replace every file with a specific theme, like a Windows 7 theme.
Using nLite
Once you've either easily or painstakingly finished the file modding part, it's time to use nLite. nLite is a program to slipstream updates, create unattended setups and customize Windows XP installations. It's a pretty neat tool. Grab the latest version from here, and run the installer. This requires .NET 2.0, but if you're running a modern Windows version then .NET 2.0 should already be installed. If not, go into optional features and enable the .NET 3.5 feature which also installs 2.0.